 English
 DIY Installation Guide for Mirrors
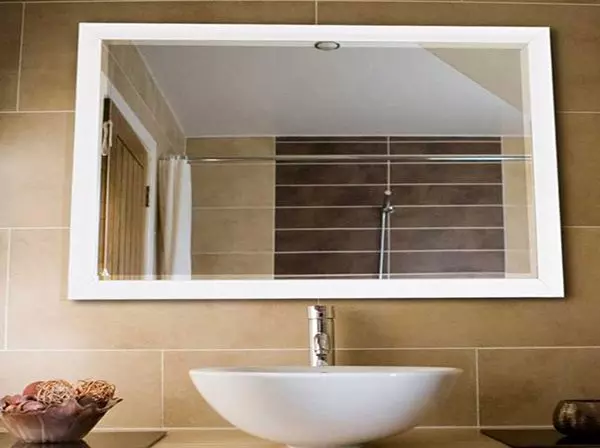
DIY Installation Guide for Mirrors
The installation of Strongco’s Custom-made Mirrors is different based on the dimensions, specifications, and configurations. Depending on the specifications you choose, we will use the most suitable mounting option-either a plastic or polystyrene (PS) foam backing plate. Simply secure the screws or the polystyrene (PS) foam backing plate in the desired position on the wall, then hang the mirror.
Notes for mounting:
‧When mounting, please ensure there is at least 10 cm of clearance above the mirror for hanging and 3-5 cm on the sides and bottom for easy placement and adjustment.
‧For enhanced stability, please use Neutral Clear Silicone Sealant for reinforcement.
*Please note that our factory does not offer on-site measurement, installation, or repair services. Each order includes the necessary backing plates and screws for easy self-installation.
Mirrors Items
DIY Installation in 3 Steps
 |
PS Foam Frame Mirror (Polystyrene Foam Frame Mirror)
|
 |
Waterproof Wood Frame Mirror (Currently Unavailable)
|
 |
Frameless Mirror / Anti-Fog Mirror / Sandblasted Mirror
|
 |
Smart Touch LED Mirror (Using LED Light Strips or Tubes)
|
 |
Aluminum Frame Mirror
|
Key Installation Tips for Bathroom Mirrors
1. Mirror Installation Height:
Mirror Installation Height: In the bathroom, mirrors are typically used while standing. The bottom edge of the mirror should be at least 135mm above the floor. If there is a significant height difference between family members, adjustments can be made accordingly. To achieve the best reflection, aim to position the face in the center of the mirror. Generally, it's ideal to set the mirror center between 160-165cm above the floor.
2. Fixing the Bathroom Mirror:
Start by measuring the distance between the hooks or holes on the back of the mirror. Mark the corresponding spots on the wall, then drill holes at these marked positions. If the wall is made of tiles, use a glass drill bit to create a hole in the tile first, then use an impact drill or hammer drill to extend the hole by 3cm. After drilling, insert plastic expansion plugs into the holes, then screw in 3cm screws, leaving 0.5cm exposed. Finally, hang the mirror on the screws.
3. Protecting the Wall When Drilling:
Be sure not to damage the wall surface during installation, especially when mounting a mirror on a tiled wall. Aim to drill into the joints between tiles rather than directly into the tile itself whenever possible.
4. Information for Using Adhesive to Secure the Mirror:
If you plan to use silicone to secure the mirror, it’s recommended to first conduct a compatibility test to ensure the adhesive is suitable for the mirror material. Be sure to use a neutral adhesive, as acidic or alkaline adhesives can react with the mirror’s material, potentially leading to oxidation and discoloration on the mirror surface.
5. Recommendations for Mirror Lighting:
To ensure the best lighting experience, Strongco's illuminated mirrors are designed as complementary lighting sources. A primary indoor light remains essential for comprehensive illumination. To enhance functionality and style, pair side lighting on the mirror with an overhead or vanity light. Strongco does not supply vanity lighting; however, if installing additional lights, we recommend fixtures with lampshades or frosted glass surfaces to reduce glare, creating a balanced and comfortable lighting environment around the mirror.

Press Release
-
 【NEW PRODUCT】O-Clean Pro Commercial Ozone Generator
O-Clean Pro Commercial Ozone Generator is a newly launched ozone machine, which can create ozone water whenever you open the faucet.
Read More -
 【NEW PRODUCT】Swivel Microbubble Faucet Aerator
Swivel Microbubble Faucet Aerator is a new special aerator that is small and can create micro-bubbles water whenever when you open the faucet.
Read More -
 【NEW PRODUCT】Ozone Laundry System
O-Clean Laundry Purifier is a greener, cleaner and safer device for your washing machine.
Read More
It utilizes an Ozone Injection Valve to vacuum ozone gas into the water to destroy bacteria, and mould...